Sau khi train được một model phát hiện đối tượng (Object detection) chúng ta muốn chạy xem model hoạt động ra sao thì chúng ta cần cài đặt cả thư viện đã dùng để train và opencv để đọc ảnh từ máy tính hoặc stream video.
Code thường sau khi train xong để chạy thử nghiệm
import os
import cv2
import numpy as np
import tensorflow as tf
import sys

# This is needed since the notebook is stored in the object_detection folder.
sys.path.append("..")

# Import utilites
from utils import label_map_util
from utils import visualization_utils as vis_util

# Name of the directory containing the object detection module we're using
MODEL_NAME = 'inference_graph' # The path to the directory where frozen_inference_graph is stored.
IMAGE_NAME = '11man.jpg'  # The path to the image in which the object has to be detected.

# Grab path to current working directory
CWD_PATH = os.getcwd()

# Path to frozen detection graph .pb file, which contains the model that is used
# for object detection.
PATH_TO_CKPT = os.path.join(CWD_PATH, MODEL_NAME, 'frozen_inference_graph.pb')

# Path to label map file
PATH_TO_LABELS = os.path.join(CWD_PATH, 'training', 'labelmap.pbtxt')

# Path to image
PATH_TO_IMAGE = os.path.join(CWD_PATH, IMAGE_NAME)

# Number of classes the object detector can identify
NUM_CLASSES = 2

# Load the label map.
# Label maps map indices to category names, so that when our convolution
# network predicts `5`, we know that this corresponds to `king`.
# Here we use internal utility functions, but anything that returns a
# dictionary mapping integers to appropriate string labels would be fine
label_map = label_map_util.load_labelmap(PATH_TO_LABELS)
categories = label_map_util.convert_label_map_to_categories(
        label_map, max_num_classes = NUM_CLASSES, use_display_name = True)
category_index = label_map_util.create_category_index(categories)

# Load the Tensorflow model into memory.
detection_graph = tf.Graph()
with detection_graph.as_default():
    od_graph_def = tf.GraphDef()
    with tf.gfile.GFile(PATH_TO_CKPT, 'rb') as fid:
        serialized_graph = fid.read()
        od_graph_def.ParseFromString(serialized_graph)
        tf.import_graph_def(od_graph_def, name ='')

    sess = tf.Session(graph = detection_graph)

# Define input and output tensors (i.e. data) for the object detection classifier

# Input tensor is the image
image_tensor = detection_graph.get_tensor_by_name('image_tensor:0')

# Output tensors are the detection boxes, scores, and classes
# Each box represents a part of the image where a particular object was detected
detection_boxes = detection_graph.get_tensor_by_name('detection_boxes:0')

# Each score represents level of confidence for each of the objects.
# The score is shown on the result image, together with the class label.
detection_scores = detection_graph.get_tensor_by_name('detection_scores:0')
detection_classes = detection_graph.get_tensor_by_name('detection_classes:0')

# Number of objects detected
num_detections = detection_graph.get_tensor_by_name('num_detections:0')

# Load image using OpenCV and
# expand image dimensions to have shape: [1, None, None, 3]
# i.e. a single-column array, where each item in the column has the pixel RGB value
image = cv2.imread(PATH_TO_IMAGE)
image_expanded = np.expand_dims(image, axis = 0)

# Perform the actual detection by running the model with the image as input
(boxes, scores, classes, num) = sess.run(
    [detection_boxes, detection_scores, detection_classes, num_detections],
    feed_dict ={image_tensor: image_expanded})

# Draw the results of the detection (aka 'visualize the results')

vis_util.visualize_boxes_and_labels_on_image_array(
    image,
    np.squeeze(boxes),
    np.squeeze(classes).astype(np.int32),
    np.squeeze(scores),
    category_index,
    use_normalized_coordinates = True,
    line_thickness = 8,
    min_score_thresh = 0.60)

# All the results have been drawn on the image. Now display the image.
cv2.imshow('Object detector', image)

# Press any key to close the image
cv2.waitKey(0)

# Clean up
cv2.destroyAllWindows()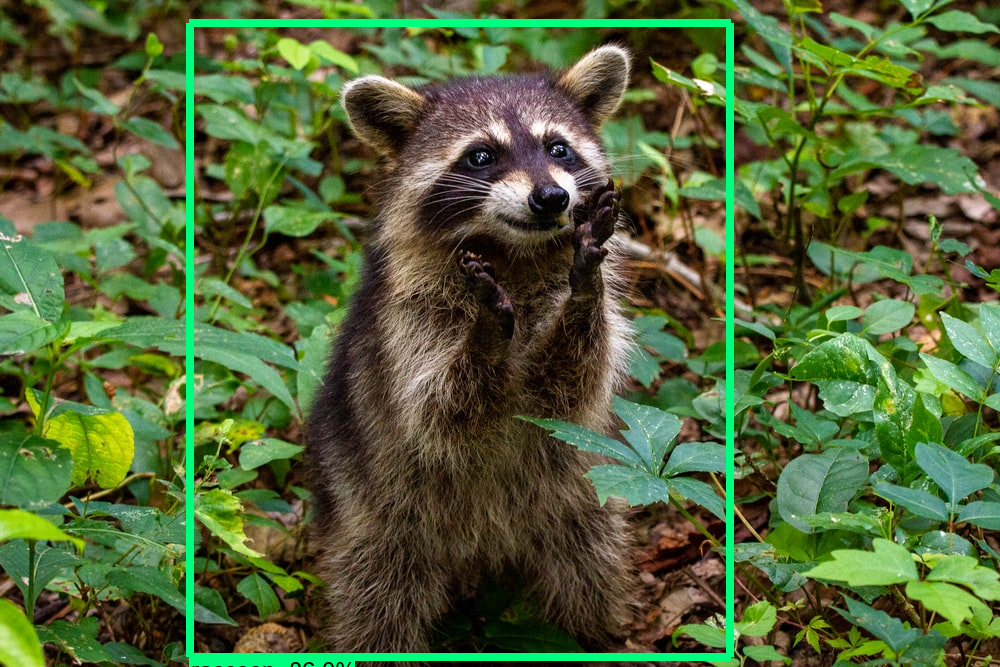
Như trên đã thấy chúng ta cần import thư viện tensorflow để load model đã được train.
Cách train model phát hiện đối tượng các bạn xem lại các bài viết này Tensorflow 1, Tensorflow 2 .
Sau đây mình sẽ hướng dẫn cách load model tensorflow để chạy thử mà không cần import thư viện tensorflow mà chỉ cần Opencv là đủ mà tốc độ còn nhanh hơn nữa chứ quá ngon phải không nào :v
Đầu tiên sau khi train xong chúng ta convert được file có đuôi mở rộng là .pb
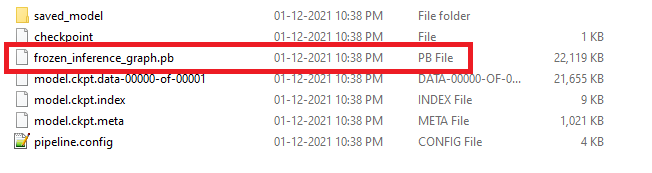
Và chúng ta cần thêm một file nữa là file có đuôi mở rộng là label.pbtxt
item {
    id: 1
    name: 'pistol'
}
Opencv cần một file cấu hình dựa trên file .pb là file .pbtxt. Để có thể generate ra file .pbtxt chúng ta sử dụng các file OpenCV Github repository tùy theo model chúng ta đã train từ trước. Opencv hỗ trợ các file sau :
Ở bài trước do mình train model sử dụng model ssd nên mình sẽ sử dụng file tf_text_graph_ssd.py. Trước hết hãy tải code của opencv repository trên github về như hình bên dưới :
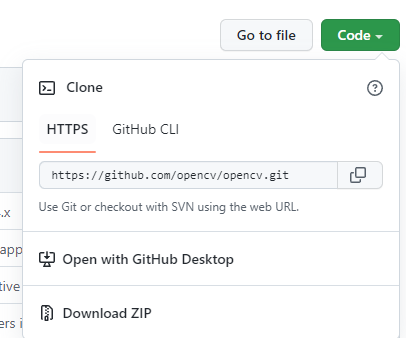
Hoặc bạn nào đã cài git trên máy thì có thể chạy lệnh
git clone https://github.com/opencv/opencv.gitTiếp theo mở cửa số command line trong môi trường có đầy đủ các thư viện đã dùng để train model trước đó. Ở đây mình dùng môi trường ảo nên phải activate trước. Sau đó truy cập đến folder chứa file tf_text_graph_ssd.py theo đường dẫn
dir_save_opencv_repository/samples/dnnTiếp thep chạy script
python tf_text_graph_ssd.py
--input frozen_inference_graph.pb (đường dẫn file model)
--config pipeline.config (đường dẫn file cấu hình khi train)
--output graph.pbtxt (đường dẫn file đầu ra)
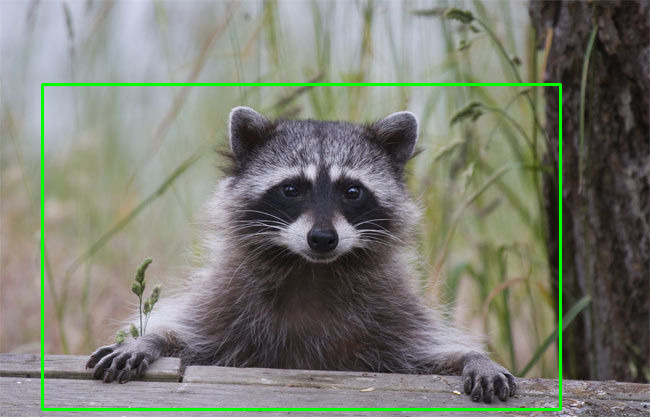
Cuối cùng là chạy thử thôi
import cv2 as cv

cvNet = cv.dnn.readNetFromTensorflow('frozen_inference_graph.pb', 'graph.pbtxt')

img = cv.imread('example.jpg')
rows = img.shape[0]
cols = img.shape[1]

tensorflowNet.setInput(cv2.dnn.blobFromImage(img, size=(300, 300), swapRB=True, crop=False))

# Runs a forward pass to compute the net output
networkOutput = tensorflowNet.forward()

# Loop on the outputs
for detection in networkOutput[0, 0]:

    score = float(detection[2])
    if score > 0.2:
        left = detection[3] * cols
        top = detection[4] * rows
        right = detection[5] * cols
        bottom = detection[6] * rows

        # draw a red rectangle around detected objects
        cv2.rectangle(img, (int(left), int(top)), (int(right), int(bottom)), (0, 255, 0), thickness=2)

# Show the image with a rectagle surrounding the detected objects
cv2.imshow('Image', img)
cv2.waitKey()
cv2.destroyAllWindows()
Tài liệu tham khảo
https://jeanvitor.com/tensorflow-object-detecion-opencv/
https://github.com/opencv/opencv/wiki/TensorFlow-Object-Detection-API
